Have you ever wondered why your student participation was limited to only a few students? Are you looking for ways to get those quiet students to tell you what they know? Do you hate waiting until an assessment to realize that a majority of your class was clueless about the concept you were working on? Giving your students different methods to respond to your teaching can help to solve all these problems. Below are three ways to get increase communication in your classroom.
 Padlet:
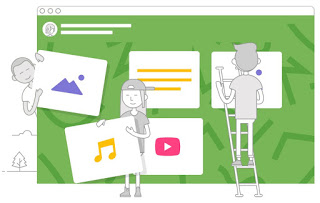
What is it? Padlet is an online virtual bulletin board where students and teachers can collaborate, reflect and share in a secure location.
How do I use it?
1. Go to www.padlet.com and sign up for an account. Unfortunately, recently Padlet started to charge a fee for using their service. At the time this blog post was created, Padlet stated you can make up to 7 Padlets for free. Beyond that, they have pricing plans that start at $12 a month.
a. The free plan, called Padlet Basic includes the following:
· Search
· Themes
· Stats
· Premium wallpapers
· Cross-device support for uploaded videos
Once your account is created, click the + to make a Padlet. There are several options to choose from. Choose the one that would make the most sense for your lesson.
i. Wall – student responses pop up in a brick-like style
ii. Canvas – connections are made within the responses
iii. Stream – responses are aligned to make viewing them easier
iv. Grid – like wall but arranged in boxes
v. Shelf – responses can be arranged in columns – great for KWL or a categorization activity
vi. Backchannel – like a Q&A chat
2 Once you choose which one works for you, you can modify the look of the “wall” to make it fit your assignment.
Sharing out – Students can access your Padlet in a few different ways. In the top left, there is an option that says “share”. Click there to see your options.
a. First you will be asked to look over your privacy settings. Make sure they fit your needs.
b. Next, click on Share/Export/Embed. There are a few ways to share out your Padlet…
i. QR Code
ii. Copy link: Simply drop the link into your LMS for students to access easily.
iii. Embed it into your website
iv. Email
v. Share: You can share on Facebook, Twitter or Google Classroom
If you want to export your wall, you can do so as an image, PDF, Excel spreadsheet or print it.
Why Use Padlet?
Padlet allows students to share what they know without actually having to get up in front of the classroom. Many students worry about their classmates judging them or are too shy to participate in class. Padlet allows students that fit this profile to also have a voice in your classroom.
In addition, Padlet is great for all types of students as it mixes things up and keeps students engaged.
How to Use Padlet in Your Classroom…
Here are some ideas of how to use Padlet in your classroom:
ü Brainstorm on a topic or idea
ü Q&A: During a lesson, students can post their questions on the Padlet instead of interrupting. Stop periodically to answer their questions or other students can peek in and answer for you.
ü Exit tickets: Instead of wasting paper, students can quickly post on Padlet. Students may be more truthful in what they know or need more help with.
ü Book discussions: Summarize, discuss themes, characters, symbolism, etc.
ü Current Events: Each day a different student adds an article and others respond to it.
Podcasts: A podcast is an audio story created to share ideas, presentations, or music. Often, students have a lot to say but may be scared or fearful to present in front of others. Podcasts take away the visual aspect of presenting and focus on auditory skills. Students create an audio recording that can be shared with others.
How to Create a Podcast: Here are some programs that you can use to create a podcast.
- · Vocaroo
- · Online Voice Recorder
- · Cattura
Creation is pretty simple. Before allowing students to create, they are encouraged to create a script or note cards. This ensures that their presentation has everything that is required.
Uses in the Classroom:
ü Book summaries: Students summarize, give a book review, talk about theme, characters, etc.
ü Fluency assessment
ü Interviews for newspaper
ü Life histories of relatives
ü Group discussions
ü Current event chats
 Flipgrid: Flipgrid is the leading video discussion platform for millions of PreK to Ph.D. educators, students, and their families around the world. Flipgrid promotes fun and social learning by giving every student an equal and amplified voice in discussing prompts organized by the educator.
Flipgrid allows you to promote discussion and engagement in your classroom.
Heard the news?! Flipgrid is FREE for all educators. Microsoft bought it out in June and all aspects are now free. ?
Getting Started: Go to www.flipgrid.com to get started. Create an account. Once it is created, you will want to make your first grid. Think of the grid as your classroom or community where your students will respond. Depending on what you teach, you may choose to have just one grid which will encompass everything, or you can break it down by subject area. You may want separate grids per period. How you decide to organize it is up to you. There are several options to choose from. For the most part, choosing “Classroom” is your best bet although you can read through the other options to see if they would work for you.
Ø Next, you will choose a password for your grid. This helps to keep it secure ensuring the right eyes are on it.
Ø Customize your grid by choosing a name, flip code, purpose, security, background, and features.
To add an assignment, once you are in your grid, you will click the blue button that says “New Topic”. This is where your students will follow your directions to create their response. You will
Ø name the assignment,
Ø select a video response time,
Ø topic display date,
Ø description,
Ø privacy settings,
Ø response features
Ø feedback
Some advice:
ü When selecting video response time, it will default to a minute and 30 seconds. For the most part, this is a suitable amount of time. Five minutes is the max which may not seem like a lot until you are watching it.
ü Students enjoy the response features. They like to decorate their feature image with the stickers and such that are provided.
ü Feedback – in some classrooms this works seamlessly. In others, it can be problematic. Feedback can be seen as a competition for your students because of the social media-like aspects. Choose what works for you.
To Share the Assignment:
Now that you have created the assignment, you need to share it with your students so that they can complete it. You can do this in one of three ways:
- · Share out the grid code
- · Share the link. Simply insert the link in your LMS where they can easily click and start the assignment.
- · QR Code: Have students scan the QR code with their iPads to quickly access it.
More tips:
· Some students don’t like to be on video, but they have something to say. To accommodate these students, let them know that they do not have to physically be on the screen. Often, I will include video instructions for my students to follow however when doing so, I have the camera pointed to a book we are talking about or a different object related to the topic.
Uses in the Classroom:
ü Have students respond to their summer reading project
ü Book discussions
ü Math – have students explain how to solve a math problem
ü Science – students can explain their science project results
ü Foreign language – ask students a question and have them respond in the foreign language
ü Music – students can practice their instrument and post for homework
ü Social Studies – Students can respond to current events
ü Exit tickets
ü Growth in learning – I used to think… Now I think…
ü Leave messages for next year’s classes
Want a chance to try it out before using it in your classroom? Respond to my FlipGrid question below. The password is Hello123.
Want a chance to try it out before using it in your classroom? Respond to my FlipGrid question below. The password is Hello123.
Want more tips and tricks to use in your classroom?
Subscribe below to get more FREE ideas to use in your classroom.
Success! Now check your email to confirm your subscription.
There was an error submitting your subscription. Please try again.
